In the old days on my OSX machine I was used to either install XAMPP or reconfigure OSXs apache/php or install software via ports/homebrew.
All these approaches have there downsides and were never really satisfying.
Problems like OSX shippping with outdated software, mixing OSX provided software with manually installed software, cluttering up the system with manually installed stuff or multiple projects that have conflicting requirements.
For the wordpress development I was recently doing. I chose to use a docker based php/apache/mysql setup.
This way I can profit from the dockerization benefits (self contained, portable, reusable, setup is easily stored in version control, control the software versions used, etc.).
Given the following setup: https://github.com/fhengartner/WordPress-Skeleton
starting apache & mysql is as easy as:
cd /path/to/WordPress-Skeleton
export WWW_DIR=/path/to/WordPress-Skeleton
docker-compose build
docker-compose up
enjoy :)
This is a short list of all the steps I went through to get a real linux installation on my chromebook.
It is a real standalone linux installation, all of chromeos is gone.
Not on top of chromeos like ChrUbuntu or Crouton.
I will write all examples based on my Acer C7 Chromebook.

Linux installation
Instructions are intentionally kept short, you find detailed instructions at the links provided.
- Enable DEV Mode
- Getting a command prompt
Enable USB Boot:
sudo crossystem dev_boot_usb=1
Install custom BIOS
- Open the chromebook case
- Connect the jumper, e.g. by sticking a piece of aluminium or copper in it
- Close chromebook and boot, login as guest
- Deactivate flash write protection:
sudo flashrom --wp-deactivate
- Install custom chromebook firmware
Now you can boot from a USB-Stick or SD-Card and install linux like normally
Enable touchpad in ubuntu
Touchpad does not work in ubuntu by default.
You need the right kernel and some kernel modules loaded in the proper order.
Install mainline kernel:
wget https://raw.githubusercontent.com/medigeek/kmp-downloader/master/kmpd.py
sudo apt-get install python-bs4 python-apt
python kmpd.py -d
# choose and install newest kernel
Reboot into new kernel
Load modules in correct order:
rmmod chromeos_laptop && modprobe i2c-i801 && modprobe i2c-dev && modprobe chromeos_laptop
You might try to setup module loading with /etc/modprobe.d and /etc/modules.
However this didn't work for me.
Links
Items
Wiring
Laptop <-> USB <-> FTDI FT232RL <-> Jumper Wire <-> Breadboard <-> ESP-01.
Since the ESP-01 is not breadboard friendly I use this trick: Hacking NRF24L01 to fit a breadboard (no soldering!) .

Standard ESP wiring
- GND -> GND
- VCC & CH_PD -> VCC (3.3V)
- URXD -> TX
- UTXD -> RX
To flash the ESP:
- GND -> GND
- VCC & CH_PD -> VCC (3.3V)
- URXD -> TX
- UTXD -> RX
- GPIO2 -> VCC
- GPIO0 -> GND
(I use no resistors or capacitors, and so far everything works fine.)
Tutorials
For more information about setting up the ESP-01 visit:
Useful information
Driver
The FT232RL needs an FTDI driver: Virtual COM Port Drivers
Power supply
With the default AT firmware I was able to power the ESP-01 via GND & VCC of the FT232RL.
However if you connect to WIFI or an attached sensor (e.g. DHTxx) you need an external power supply.
With batteries it was difficult to get voltage & current right, it's much easier with the power outlet. I use a typical USB-phone charger (800mA) and connect it to the MB102.
Terminal-Software
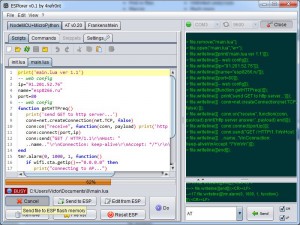
The ESPlorer act's as a kind of IDE and terminal-software, it has all the important AT-firmware and LUA commands preconfigured.
http://esp8266.ru/esplorer/

Baud rate
I was always able to connect with 9600. But apparently depending on the firmware/version that could be different.
List of (almost) all ESP variants
http://l0l.org.uk/2014/12/esp8266-modules-hardware-guide-gotta-catch-em-all/
ESP-01 PIN mapping


